

Truth and transparency in your pricing.
With increased scrutiny from the FTC and state Attorney General offices, accurate and transparent advertised pricing matters more than ever.
You already have two ways to show fees on your website. Today we are adding two more, so you can disclose exactly what you need to, exactly how you want it displayed.
What you have today
Include fees in your Internet Price
Enter a price that already includes your fees as the Internet Price, and that price goes to your website. Because the fees are built into that number, you back the fee amount out when you enter the selling price at the time of sale.
Add your Dealer Fee in Company Settings
Enter your Dealer Fee once in Company Settings. Your Internet Price goes to the website, the site adds your fee to the price automatically, and your Internet Price stays as the base number.
Two more options
Both are set up in your website’s Company Settings, alongside your Dealer Fee, not in the DMS settings.
More fee fields New
Add up to two more fees beyond your dealer fee, so you can further break out any dealer fees (fees beyond tax, tag, title) that need to be disclosed.
Itemized breakdown New
Show the itemized fee breakdown on the detailed inventory listing, so shoppers can see each fee that makes up the price.
Same total, now spelled out
From your price to an itemized total
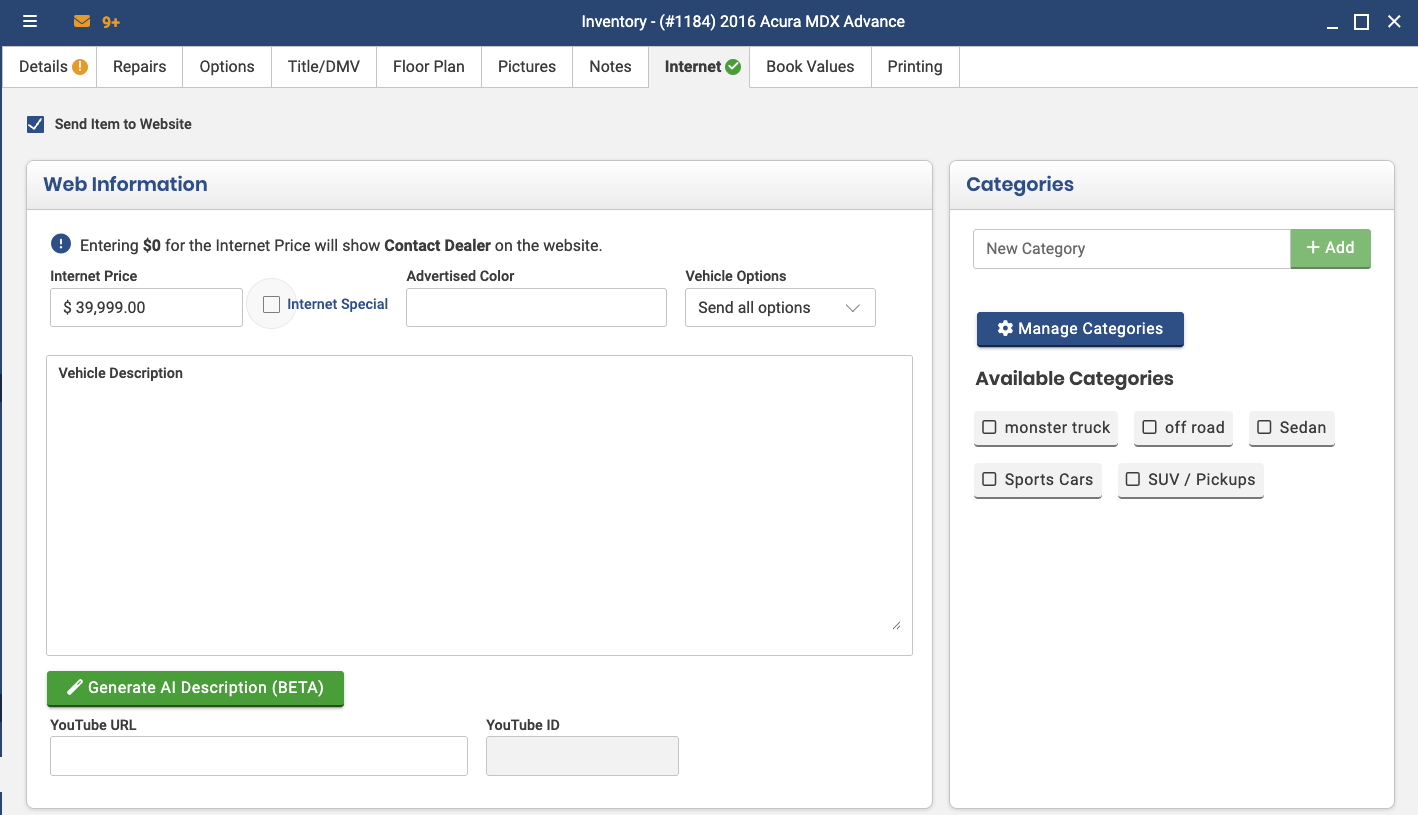
Your price starts in the DMS
As always, the DMS has a place to enter an “Internet Price” that is sent to your website. This is the base price, before any fees are added.
Add your fees in website Company Settings
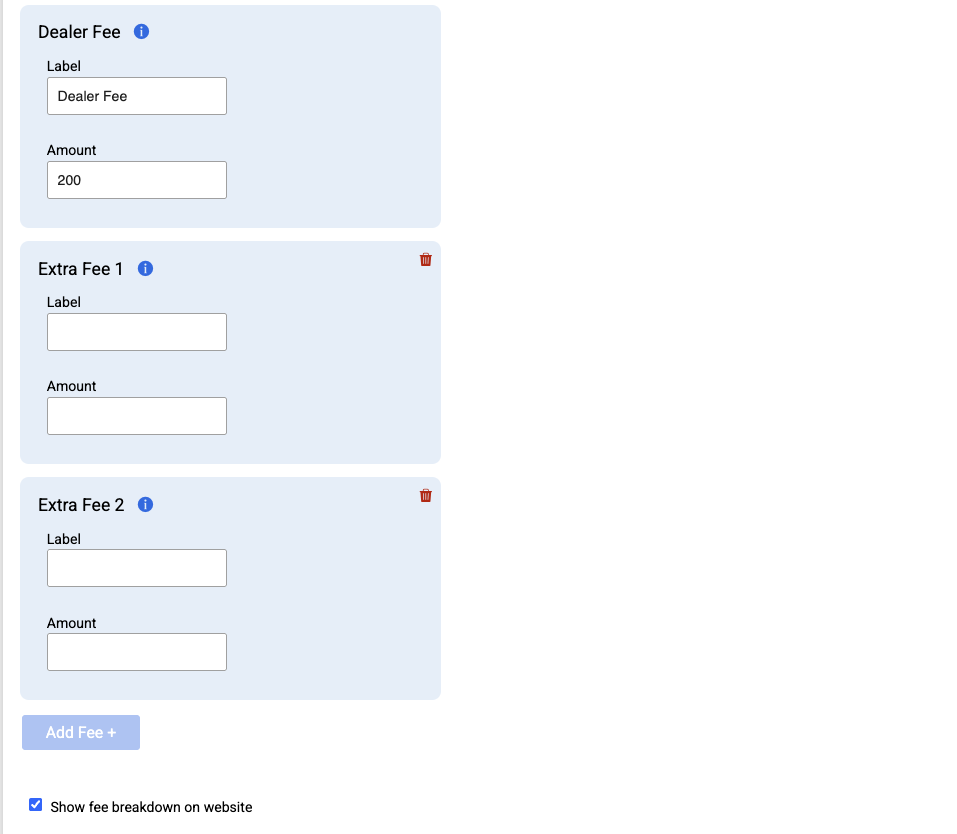
Under Company Settings › Inventory on your website, list your Dealer Fee as always, and now add up to two more fees for any additional fees you need to disclose. Each fee is added to the price sent to your website.
Show the breakdown on your listings
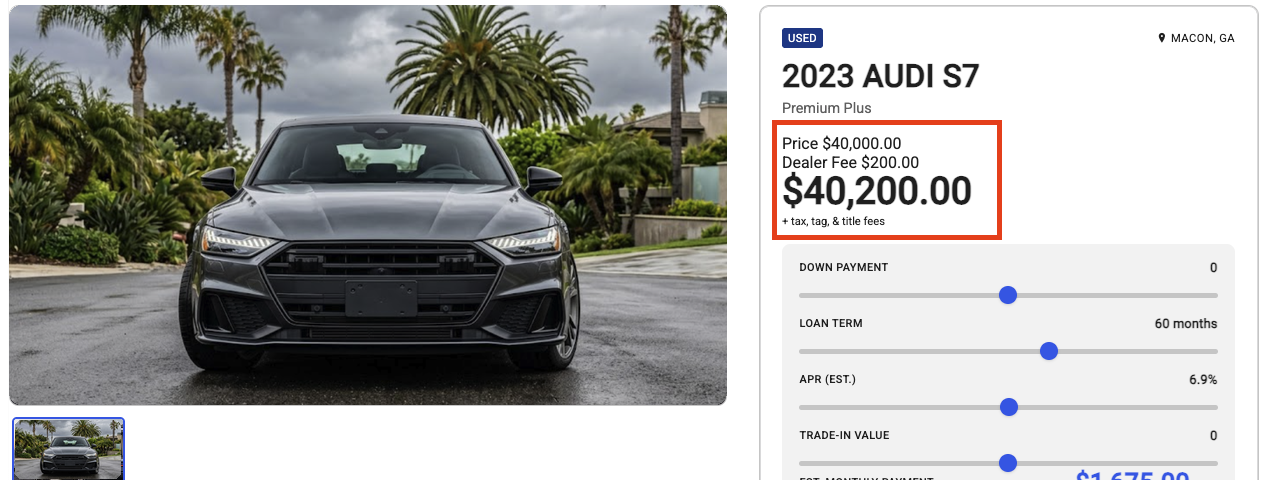
Check “Show fee breakdown on website” and the itemized breakdown appears on the detailed inventory listing. Smaller card-style views still show the final total.
How to set this up
It takes about two minutes. Log into the admin console of your website.
Go to Company Settings › Inventory.
Add your fees, Dealer Fee plus up to two more.
Check “Show fee breakdown on website” to itemize them for shoppers.
What else do you need to do?
Verify prices on your website
After you complete the setup, refresh your website to verify pricing is being reflected in the way you want. This may require a hard refresh: Control + Shift + R on Windows, or Command + Shift + R on a Mac.
If you have questions or need assistance, please reach out to our web support at (800) 701-8082 or websupport@waynereaves.com.
About third-party feeds
These fee settings don’t change what’s sent in third-party feeds. Each third party receives data by its own rules: one that normally gets just the price keeps getting the price, while one that gets the price plus fees will get the full total, but only once you’ve added the fees here. Many third parties also handle fees on their end, so coordinate with them.
It is imperative that you visit your website and the third-party websites to assure that the correct price and fees are being displayed.